
ChatGPT, Claude and MCP
Connect ChatGPT, Claude, Claude Code and any MCP client to one Aladia workspace, with the permissions of your role.
Tested in production on 29/09/2026
How the Aladia MCP server works
ChatGPT, Claude and the other AI assistants connect to Aladia through the Aladia MCP server (Model Context Protocol):
https://api.aladia.io/mcp- It works inside one workspace: the one you approve when you connect (an academy or your personal workspace). It never sees other workspaces.
- It has the permissions of your role in that workspace: what you cannot do in Aladia, the assistant cannot do either.
- Connecting creates an API key named <App> · MCP in Settings → API keys. Delete the key to disconnect: the connection stops at once.
- Every tool the assistant uses appears in the Activity log marked via MCP.
- An integration shows Connected when it made at least one request in the last 30 days.
What the assistant can do:
| Tool | What it does |
|---|---|
get_workspace | Who is connected and in which workspace |
list_courses | The courses you teach (or attend) |
get_course | Details and outline of a course |
list_course_students | The students of a course |
list_calendars, list_calendar_events | Calendars, events and lessons in a date range |
list_grading_queue | Assignments and tests waiting to be graded |
search_documents | Search the documents you can open |
create_calendar_event | Create an event in your calendar — the only tool that changes data; the assistant asks you to confirm first |
To connect an assistant you need the Owner, Admin or Developer role in the workspace (the same permission as creating an API key).
Connect Claude
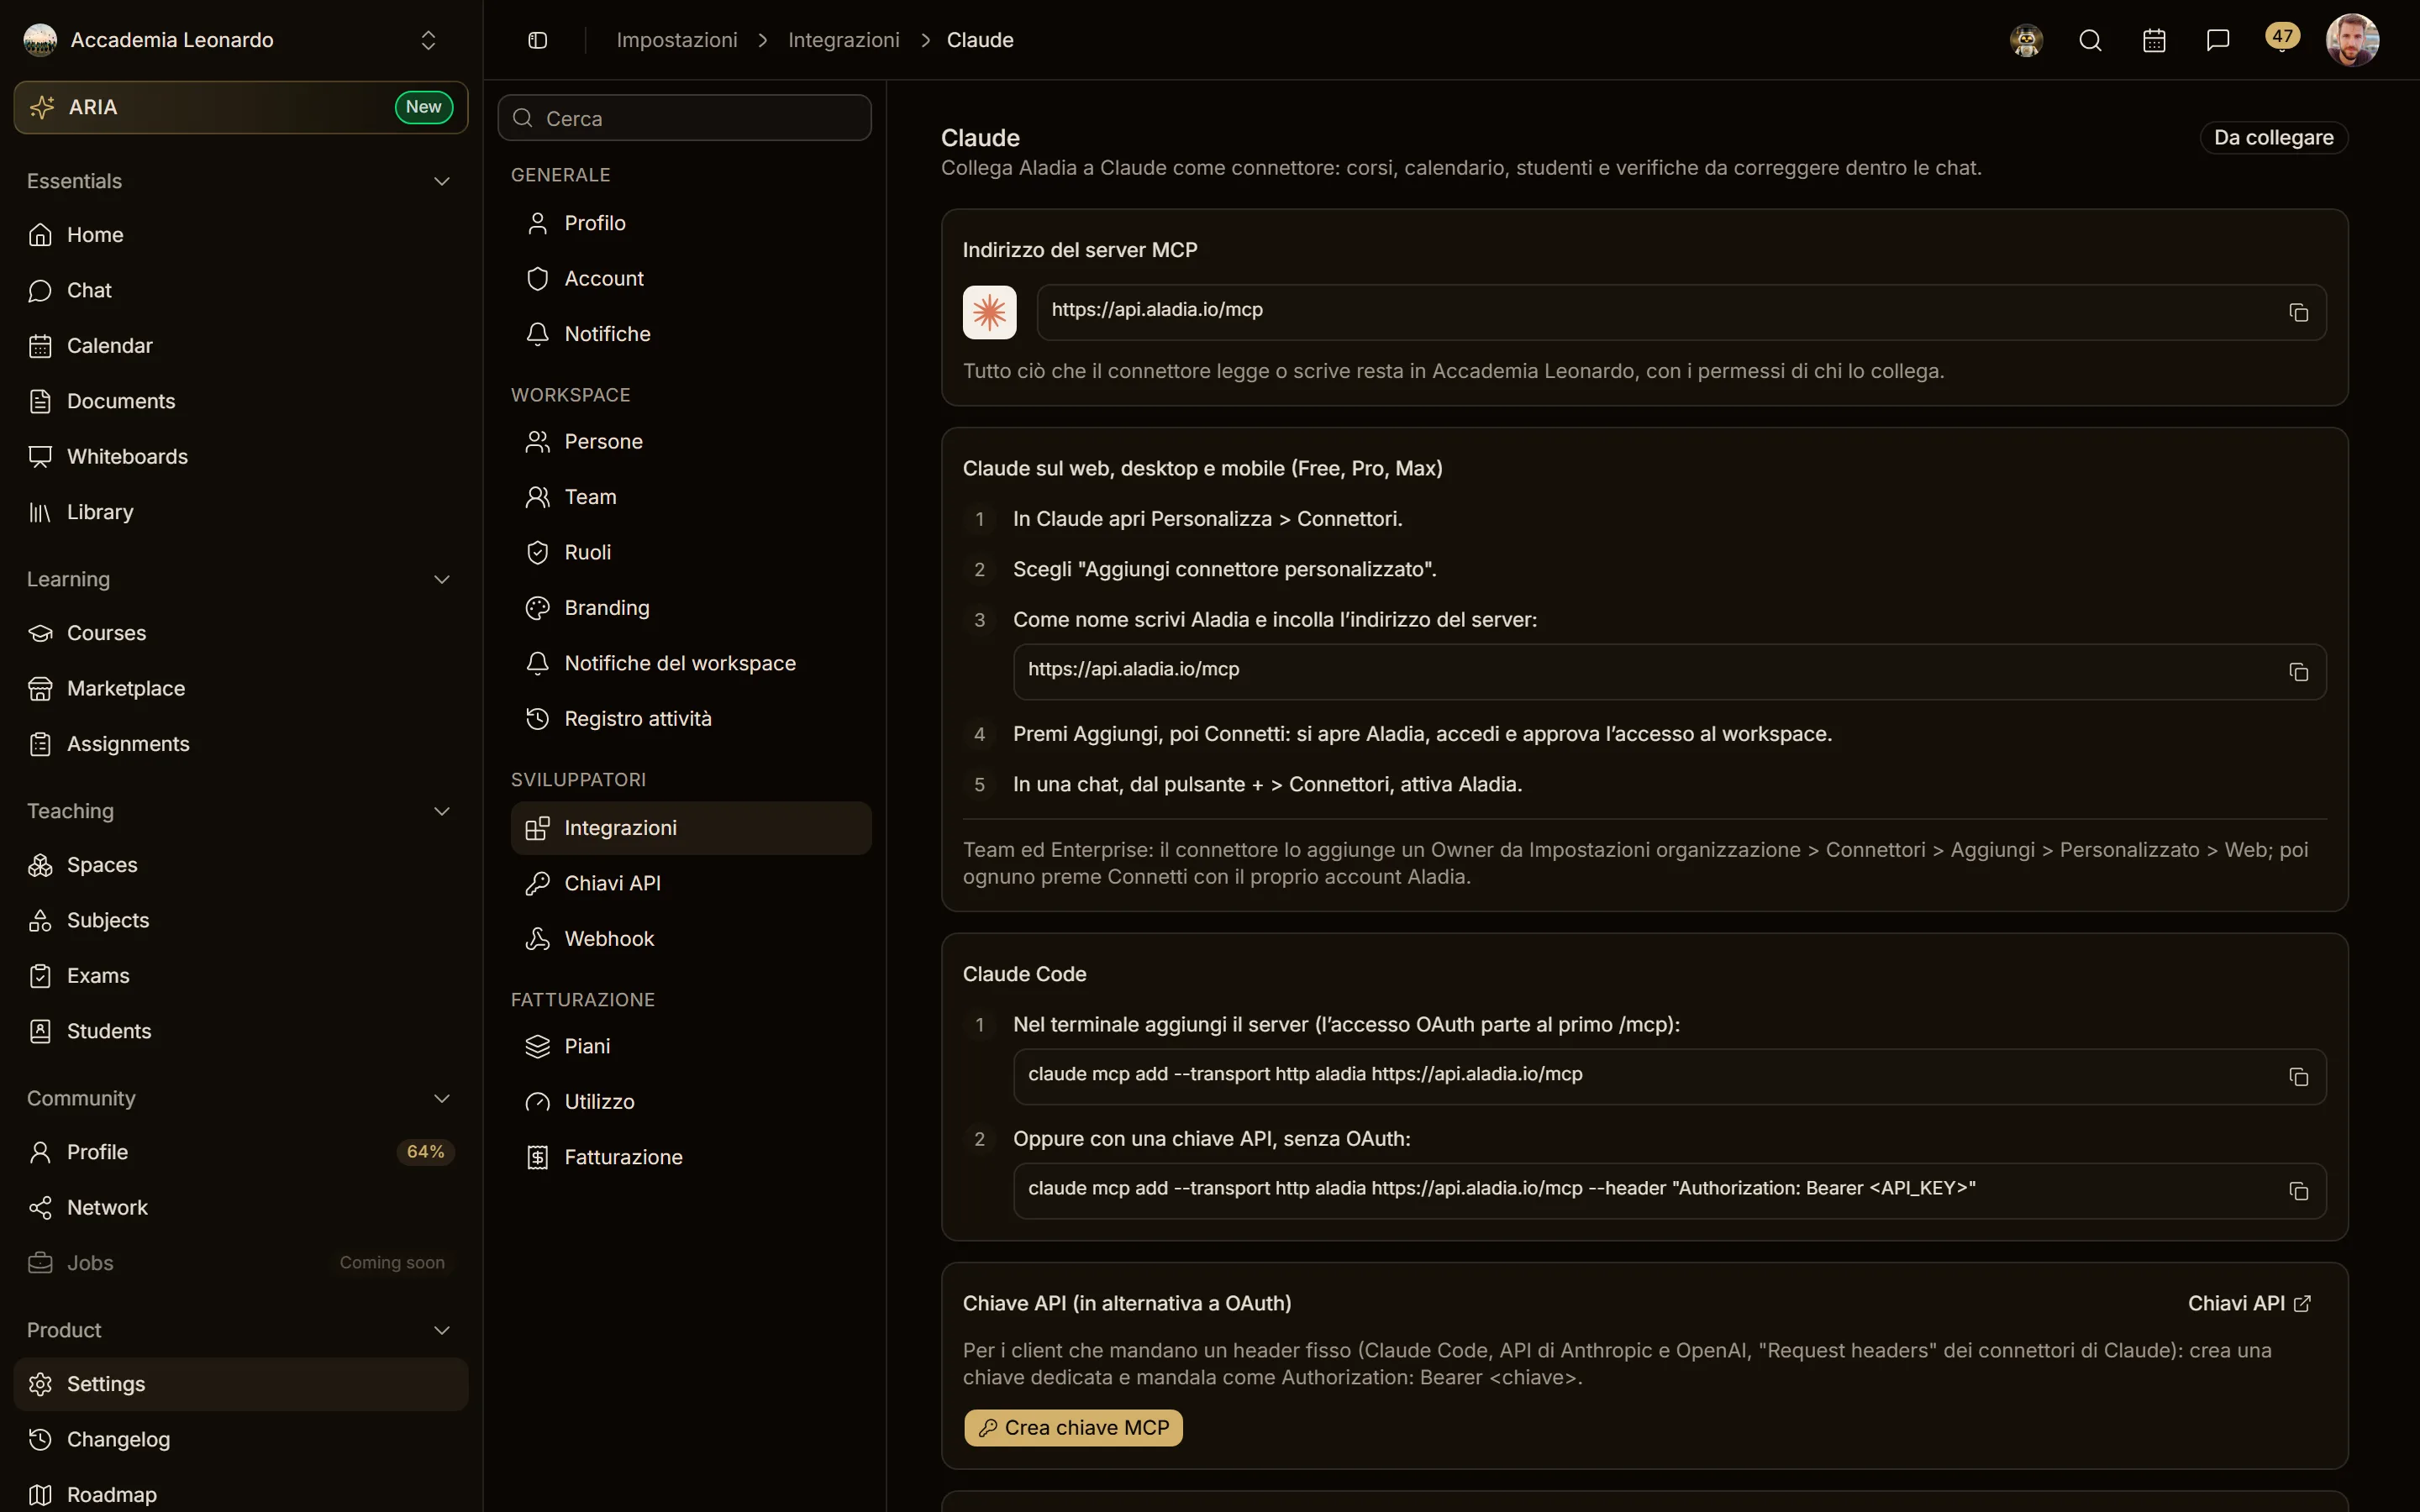
Settings → Integrations → Claude shows the server URL and these steps.
On claude.ai, the desktop app and mobile (Free, Pro and Max plans):
- In Claude open Customize → Connectors.
- Choose Add custom connector.
- Name it Aladia and paste
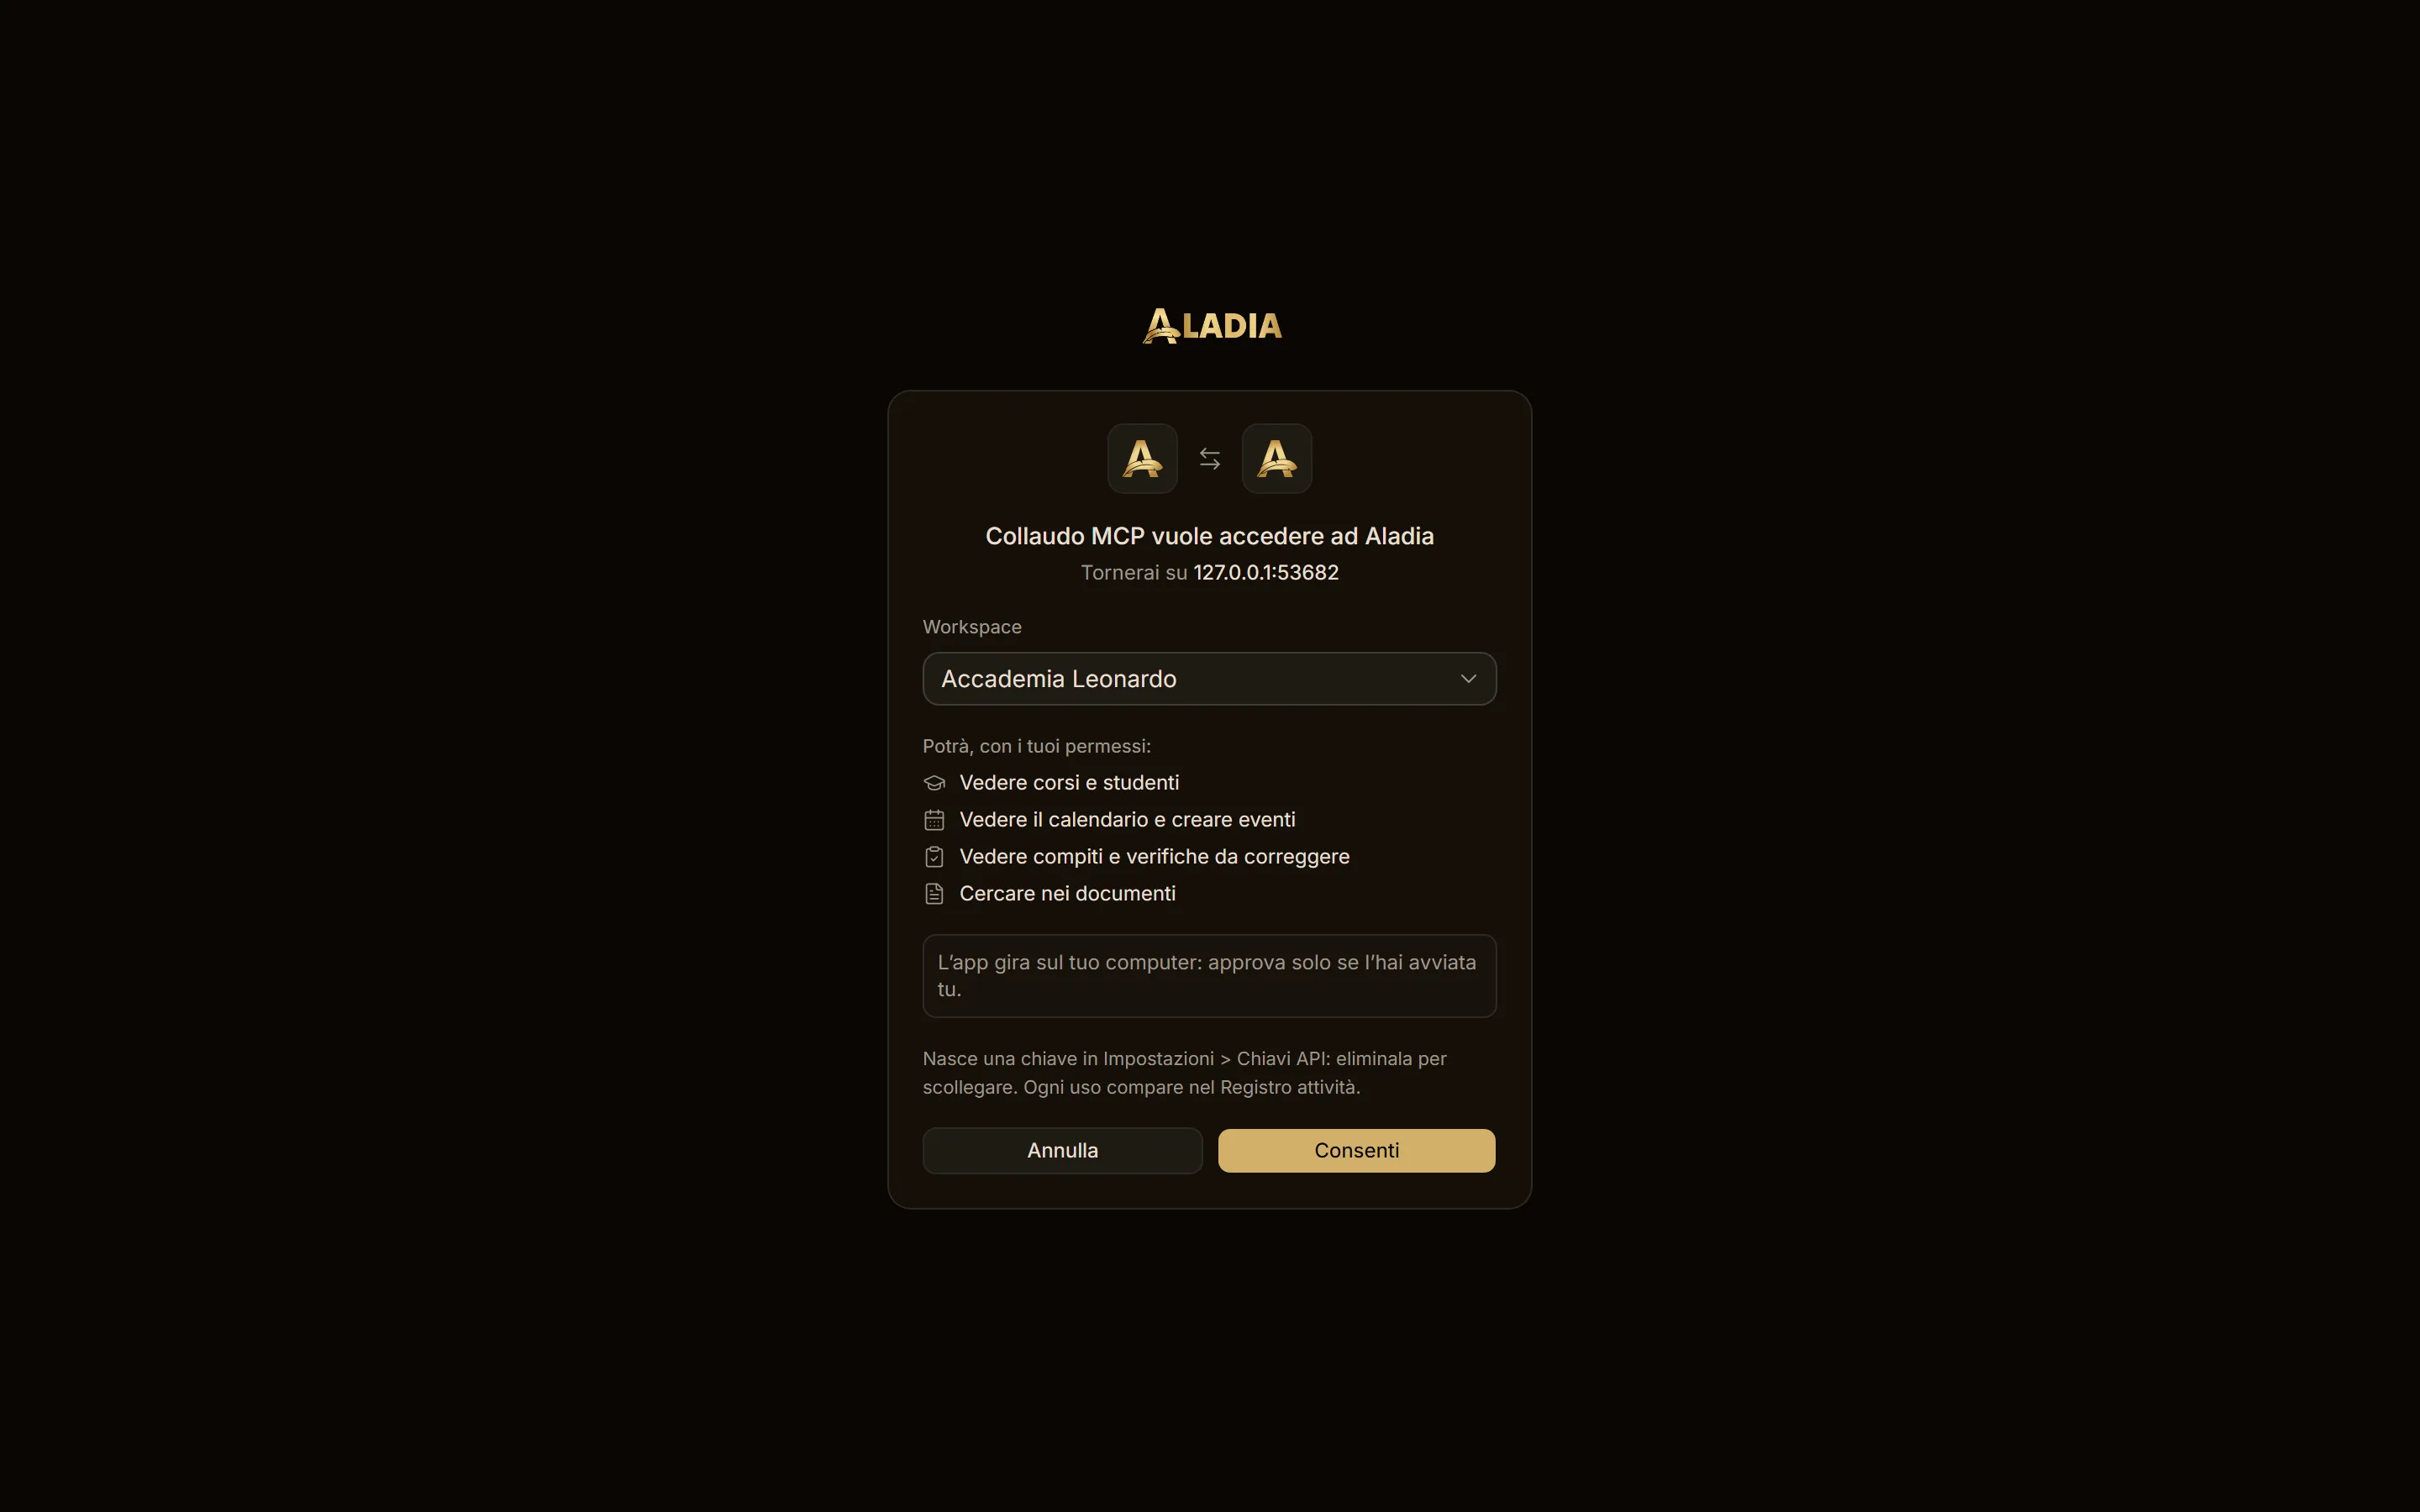
https://api.aladia.io/mcp. - Click Add, then Connect: Aladia opens. Sign in, check the workspace and click Allow.
- In a chat, open + → Connectors and turn Aladia on.
On Team and Enterprise plans an Owner adds the connector from Organization settings → Connectors → Add → Custom → Web; each member then clicks Connect with their own Aladia account.
Claude Code (terminal):
claude mcp add --transport http aladia https://api.aladia.io/mcpThe first /mcp opens the Aladia sign-in. Without OAuth, use an API key: add --header "Authorization: Bearer <API_KEY>".
Connect ChatGPT
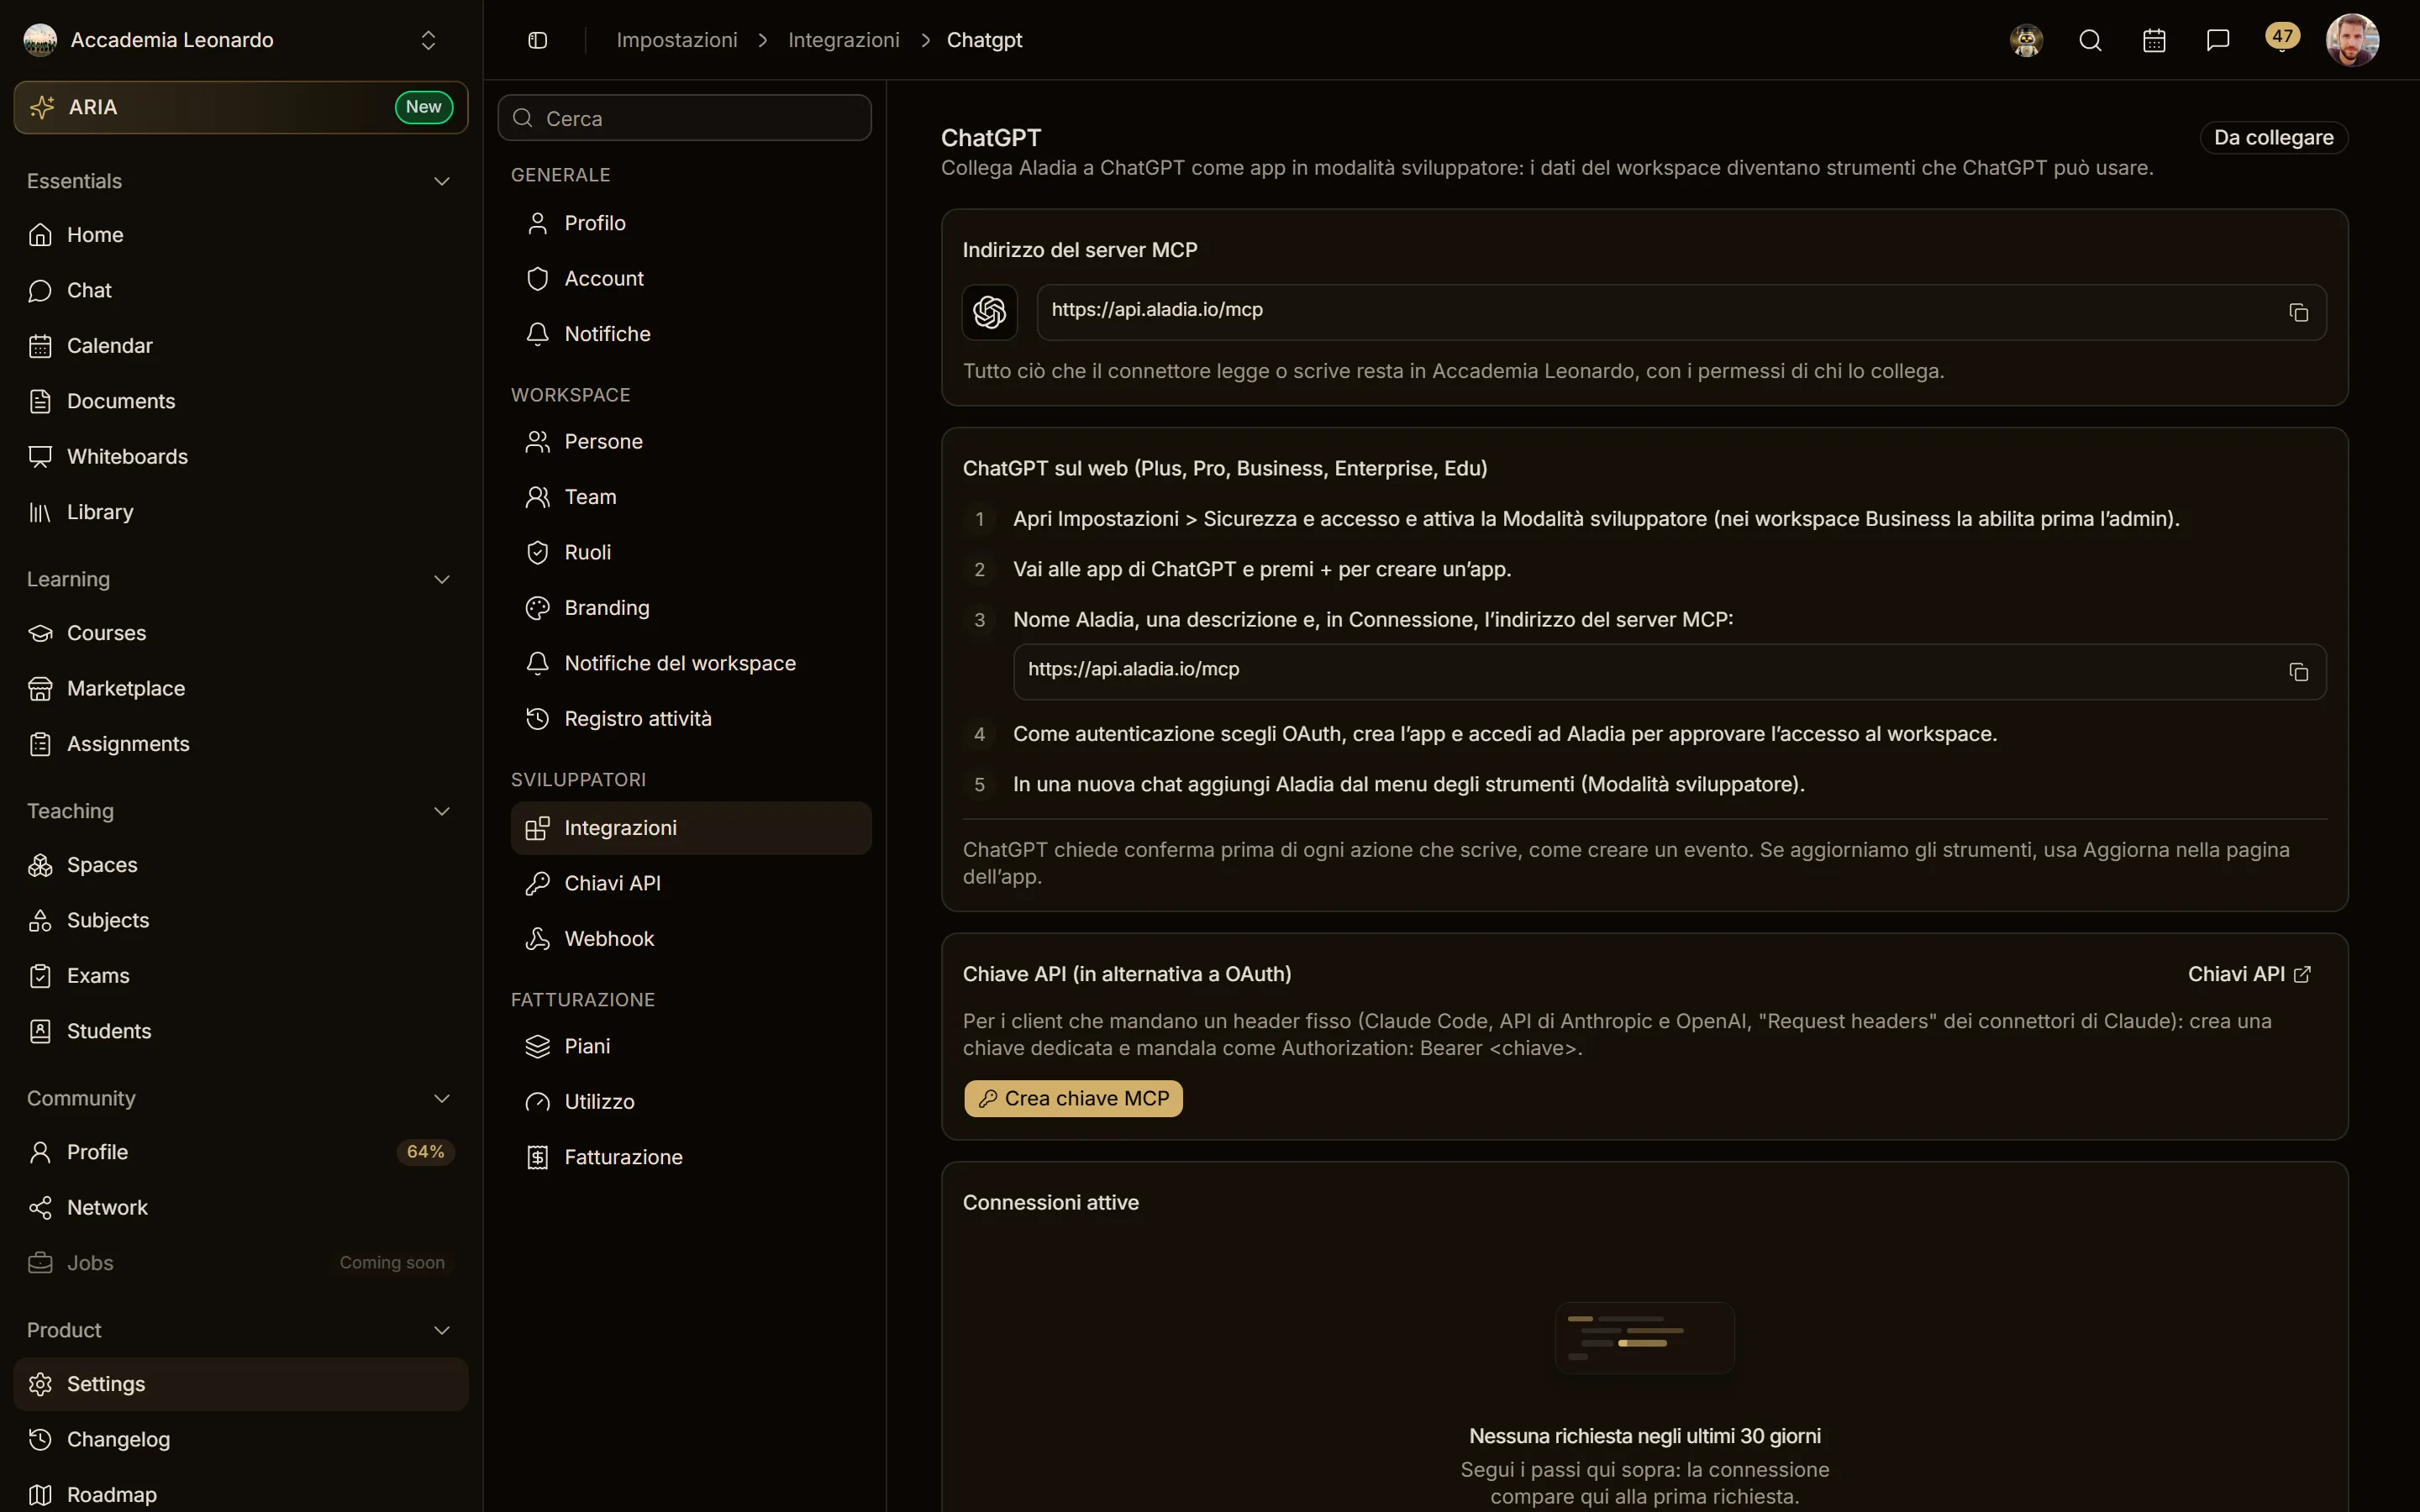
ChatGPT connects Aladia as a developer-mode app (Plus, Pro, Business, Enterprise and Edu, on the web):
- Open Settings → Security and login and turn on Developer mode. In Business and Enterprise workspaces an admin enables it first.
- Go to ChatGPT apps and press + to create an app.
- Name it Aladia, add a description and, under Connection, paste
https://api.aladia.io/mcp. - Choose OAuth, create the app and sign in to Aladia: check the workspace and click Allow.
- In a new chat, add Aladia from the tools menu (Developer mode).
ChatGPT asks for confirmation before any tool that writes. When we add tools, open the app and use Refresh.
Other MCP clients and API keys
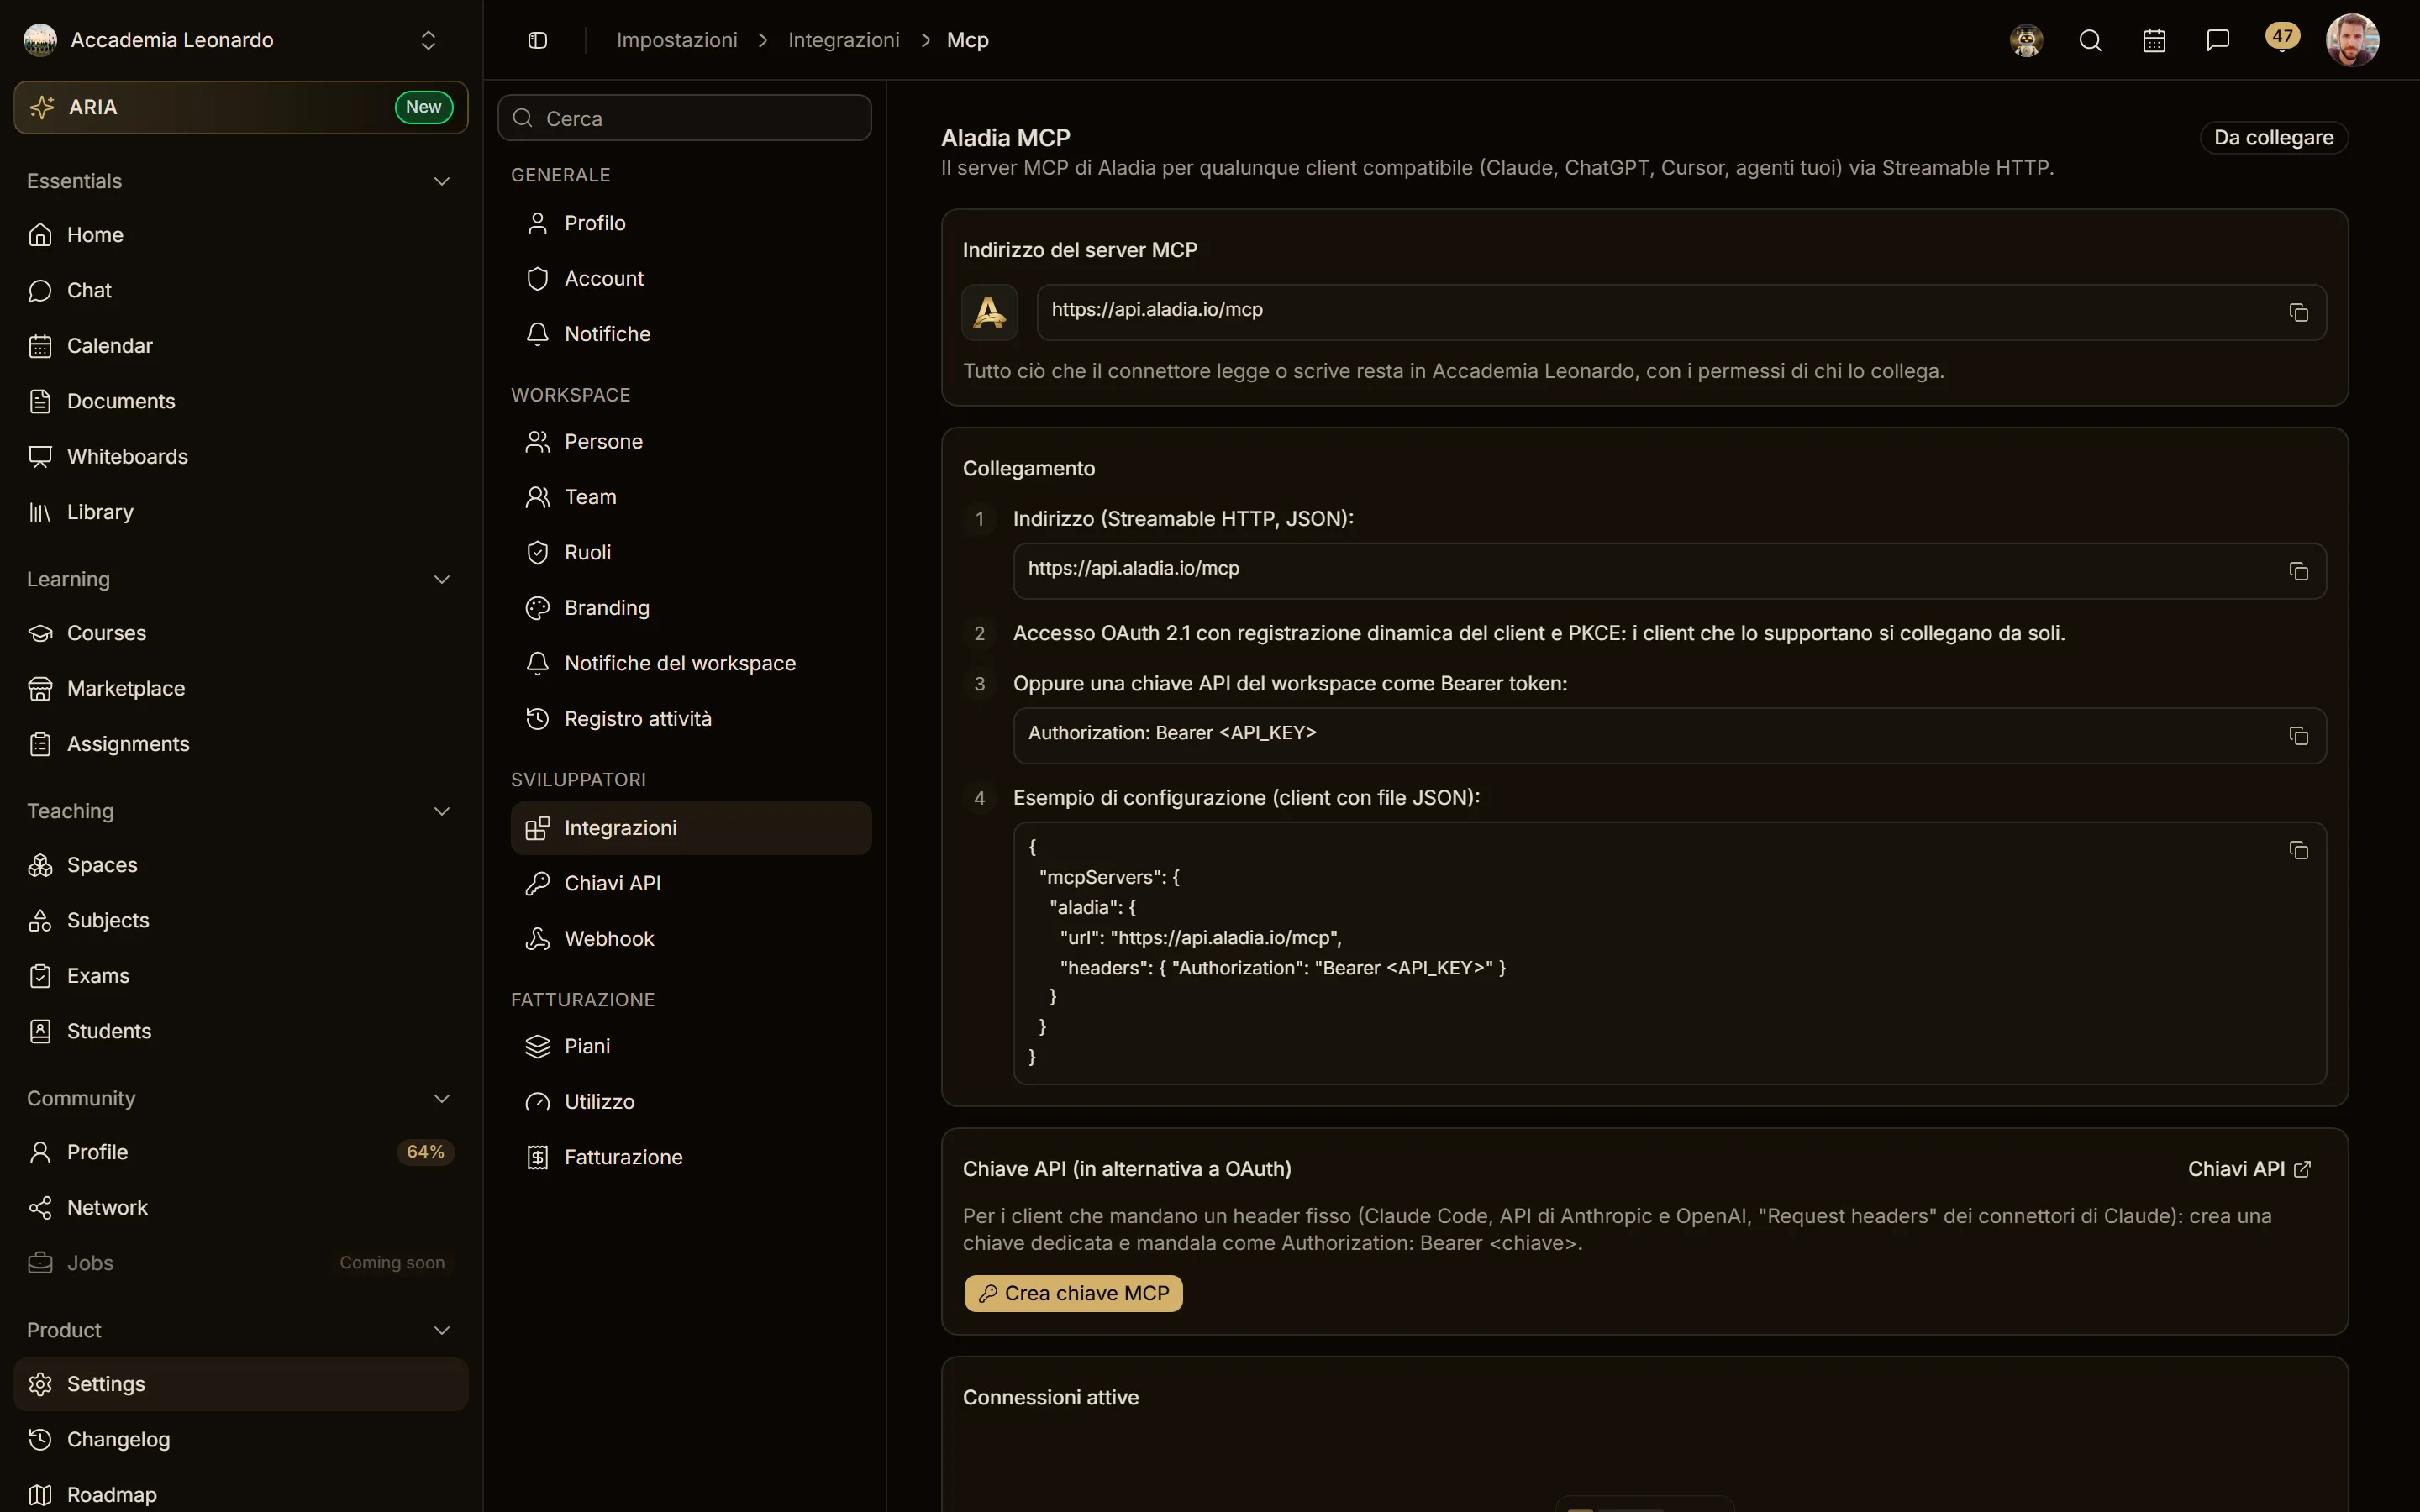
Settings → Integrations → Aladia MCP is for any other client (Cursor, your own agents, the Anthropic and OpenAI APIs):
- OAuth 2.1 with dynamic client registration and PKCE: clients that support it connect on their own from the URL.
- Or an API key as a Bearer token:
Authorization: Bearer <API_KEY>. Create MCP key creates a dedicated key and shows it once; copy it right away.
{
  "mcpServers": {
    "aladia": {
      "url": "https://api.aladia.io/mcp",
      "headers": { "Authorization": "Bearer <API_KEY>" }
    }
  }
}
Each key is limited to 120 requests per minute (20 changes per minute).